Torn Paper Edge Textures: The Secret to Authentic Digital Designs
In a world dominated by sleek vectors and pixel-perfect gradients, there is a surprising resurgence in the charm of imperfection. That raw, jagged look you see on handmade zines, vintage posters, and gritty street art? It often starts with Torn Paper Edge Textures. These digital assets are not just random scraps; they are carefully crafted elements designed to inject character, depth, and a tactile feel into your flat digital compositions. Whether you are a seasoned graphic designer or a hobbyist looking to elevate your personal projects, understanding how to leverage these textures can transform your workflow from generic to genuinely engaging.
Why Imperfection Matters in Modern Design
The appeal of torn paper lies in its ability to break the monotony of the digital screen. When we create designs entirely within software like Photoshop or Illustrator, everything feels too clean. Lines are mathematically straight, and edges are razor-sharp. This perfection can sometimes feel cold or sterile. By introducing torn paper edge textures, you introduce a human element. It suggests history, effort, and a physical presence that viewers instinctively recognize and appreciate.
This isn't about making things look "broken"; it's about adding narrative. A torn edge implies that something was ripped out of a notebook, pulled from a scrapbook, or salvaged from a larger whole. It creates a visual story before a single word is read. For entrepreneurs and marketers, this translates to authenticity. In an era where audiences are skeptical of polished corporate imagery, a design that looks hand-crafted often builds more trust and connection.
Real-World Applications for Creators and Professionals
The versatility of these textures means they fit into a wide array of scenarios. Let's look at how different professionals actually use them to solve specific design challenges.
Marketing and Branding Materials
Imagine you are launching a new eco-friendly product line or a boutique coffee shop. Your brand identity relies on sustainability and artisanal quality. Using standard clip art might feel out of place. Instead, you can layer a grunge torn paper texture behind your logo or product photo. This instantly signals "handmade" and "organic." You might use a square torn paper texture to frame a customer testimonial, making it look like a note pinned to a corkboard. It turns a static flyer into a piece of tangible communication.
Social Media Content Creation
For bloggers and social media managers, standing out in a crowded feed is crucial. A simple quote graphic can get lost among thousands of others. However, if you apply a ragged edge to your text box using one of the included PNGs, the image suddenly pops. It mimics the aesthetic of a physical collage, which performs exceptionally well on platforms like Instagram and Pinterest. You can combine multiple torn pieces to create a dynamic background that guides the viewer's eye naturally toward your call to action.
Educational Resources and Presentations
Teachers and educators often struggle to make slideshows engaging for students. A wall of bullet points is rarely exciting. By incorporating torn paper textures, you can turn a presentation into a visual journey. Imagine a history lesson where dates and facts appear on scraps of old notebook paper, scattered across the slide. It breaks up the information into digestible chunks and adds a playful, creative energy to the classroom environment. The variety of grunge forms available allows you to match the tone of your subject matter, from rough and industrial for science topics to soft and faded for literature.
Personal Projects and Scrapbooking
Hobbyists and small business owners creating invitations, wedding stationery, or personalized gifts also benefit immensely. There is nothing quite as charming as a digital invitation that looks like it was cut from a deck of vintage cards. You don't need to spend hours physically tearing paper and scanning it; you can achieve that same authentic look in minutes using high-resolution PNG files. This saves time while delivering a premium, custom aesthetic.
Understanding What You Get: A Practical Breakdown
When selecting a resource pack, it is vital to understand exactly what tools you are bringing into your toolkit. A comprehensive collection offers more than just images; it provides a complete system for creating complex compositions. Here is how the specific components of a robust texture pack translate to real-world utility:
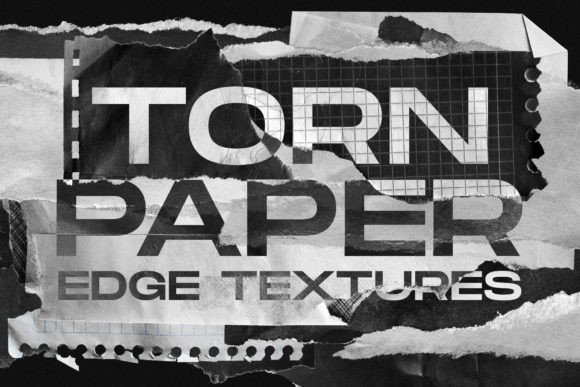
- 176 Grunge Torn Paper Textures (PNG): This is the core of the library. Having nearly two hundred variations ensures you never run out of options. Whether you need a subtle, thin tear or a heavy, distressed chunk, this volume covers every scenario. The PNG format guarantees transparency, allowing you to drop these elements directly onto any background without wrestling with white boxes.
- 41 Square Torn Paper Textures (PNG): Squares are the workhorse of grid-based layouts. These are perfect for creating mosaic effects, photo frames, or organizing content blocks in a magazine-style layout. They provide structure while maintaining that organic, imperfect edge.
- 5 Negative Examples (PNG): These are essential for advanced masking techniques. If you want to reveal a photo underneath a layer of paper, or create a "window" effect, negative space textures are indispensable. They allow for precise control over visibility and layering.
- 2 PSD Example Files: Learning by doing is often the fastest method. These pre-built compositions show you exactly how professional designers layer shadows, blend modes, and lighting to make the paper look realistic rather than pasted on. You can deconstruct these files to learn the logic behind the design.
- 6 Brushes for Photoshop: Sometimes a pre-made shape isn't enough. These brushes allow you to paint your own tears, smudges, and distress marks directly onto your canvas. They give you the freedom to customize the texture to fit your specific needs perfectly.
- Instructions and JPG Extras: Clear guidance ensures you aren't stuck guessing how to apply blend modes or adjust opacity. The extra JPG textures provide base layers for backgrounds, giving you a head start on your next project.
Choosing the Right Texture for Your Project
While having 200+ options is fantastic, it can be overwhelming if you don't know how to select the right one. The key is to consider the context and the emotion you want to evoke.
If you are designing for a luxury brand, avoid overly chaotic or dirty grunge textures. Instead, opt for cleaner tears with softer edges, perhaps resembling high-quality cardstock. For a punk rock album cover or a construction company ad, go for the heavier, darker, and more aggressive grunge forms. The texture should support your message, not distract from it.
Also, consider the color palette. Many users make the mistake of using a texture that clashes with their primary colors. Remember that most of these PNGs come with transparency, but the paper itself has a color. You can easily adjust the hue and saturation in Photoshop to match your brand guidelines. A warm, yellowed paper tone works beautifully for vintage themes, while a stark white or grey tear fits modern minimalist designs.
Getting Started with Your New Assets
Once you have downloaded your pack, the process is straightforward. Open your design software and import the PNGs. Because they are layered elements, you can stack them to create depth. Place a larger torn piece in the back, add a medium one slightly overlapping it, and finish with a smaller detail on top. Add a subtle drop shadow to each layer to ground them in the composition. This technique creates a sense of three-dimensionality that flat graphics simply cannot achieve.
Don't forget to experiment with the included brushes. Use them to add ink splatters, pencil marks, or dust around the edges of your paper. These small details sell the illusion that the paper exists in the real world. With the PSD examples provided, you can reverse-engineer professional-looking results quickly, learning the settings and techniques as you go.
Final Thoughts on Elevating Your Work
The difference between a good design and a memorable one often comes down to the details. Torn Paper Edge Textures offer a quick, efficient way to add those crucial details without needing extensive manual labor. They bridge the gap between the digital and physical worlds, giving your work a soulful, authentic touch that resonates with people.
Whether you are a marketer trying to grab attention, a teacher making lessons fun, or an artist building a portfolio, these resources provide the flexibility to adapt to any style. By combining the vast library of textures with the included brushes and tutorials, you unlock the potential to create amazing compositions that stand out in a crowded marketplace. Don't let your designs remain flat and lifeless; bring them to life with the rugged beauty of torn paper today.